Salesforce You Cant Run More Than 500 Reports Synchronously Every 60 Minutes. Try Again Later.
The Reports and Dashboards Residual API gives you programmatic access to your report and dashboard data as defined in the report builder and dashboard builder. The API lets you integrate the data into any web or mobile application, inside or outside the Salesforce platform.
You tin use this data in various ways like below:
• Integrate report data into custom objects.
• Define rich visualizations on summit of the API to animate the data.
• Build custom dashboards.
• Automate reporting tasks.
At a high level, the API resources let you query and filter report data. Yous can:
• Run tabular, summary, or matrix reports synchronously or asynchronously.
• Filter for specific data on the fly.
• Query report metadata.
You can also piece of work with dashboard resources to:
• Get a list of recently used dashboards.
• Go dashboard metadata and information.
• Query dashboard status.
• Refresh dashboards.
Requirements and Limitations:
The Reports and Dashboards REST API is available for any organization that has API enabled. You must found an authenticated session using OAuth in guild to admission the Reports and Dashboards REST API. When working with this API, consider these restrictions in addition to general API limits.
Note: Responses and requests are in JSON. While using the Reports and Dashboards Rest API with a Postal service request body, you must utilize content-type: application/json. Yous might get unexpected results if you don't employ this content type.
Reports Limits:
• Cross filters, standard written report filters, and filtering by row limit are unavailable when filtering data.
• Historical trend reports are only supported for matrix reports.
• The API can process just reports that contain upwards to 100 fields selected as columns.
• A list of up to 200 recently viewed reports tin can exist returned.
• Your org tin can asking up to 500 synchronous report runs per hour.
• The API supports upwardly to 20 synchronous report run requests at a fourth dimension.
• A list of up to ii,000 instances of a report that was run asynchronously tin can be returned.
• The API supports up to 200 requests at a fourth dimension to get results of asynchronous study runs.
• Your organization can asking up to 1,200 asynchronous requests per 60 minutes.
• Asynchronous written report run results are bachelor within a 24-hour rolling period.
• The API returns upwardly to the start 2,000 report rows. You can narrow results using filters.
• You can add up to 20 custom field filters when you lot run a report.
Dashboards Limits:
• Your org tin can asking up to 200 dashboard refreshes per 60 minutes.
• Your org tin can request results for up to v,000 dashboards per hour.
Analytics Notification Limits
• Each user can subscribe to up to five reports.
• Each user can create up to five Wave notifications.
Note: All limits that utilise to reports created in the report builder also use to the API, as do limits for dashboards created in the dashboard builder. For more information, see "Salesforce Reports and Dashboards Limits" in the Salesforce online help.
Python Script to access salesforce information straight from Study:
#Connect to the Salesforce Analytics API and request information from a report import salesforce_reporting import pandas as pd from salesforce_reporting import Connexion, ReportParser # setup your login details sf = Connection(username='user_name', countersign='Password', security_token='Security_token') #Use the Connection.get_report() method to request study data and then use ReportParser to admission all the records #included in a report (in list format if you use the ReportParser.records() method): study = sf.get_report('report_id') parser = salesforce_reporting.ReportParser(report) parser.records() df = pd.DataFrame(study) print(df) 
Before connecting force.com token to python, first you kickoff need to create aContinued App in Saleforce.
A connected app is an application that integrates with salesforce.com using APIs and uses either SAML and OAuth protocols to authenticate, provide Single Sign-On, and provide tokens for utilize with Salesforce APIs. In addition to standard OAuth capabilities, continued apps allow administrators to set various security policies and have explicit control over who may use the applications.
- Login to your Salesforce organization: https://login.salesforce.com/
- Create aContinued App by clickingCreate,App, soNew in theContinued Apps section.
- Enter all the pertinent data and enableAPI (Enable OAuth Settings) withTotal access (full). Y'all tin likely change the access level to suit your needs, merely full access will at least work.
- Once created, grab yourConsumer Key andConsumer Clandestine. You'll demand them in a moment.
Using this data, y'all tin now execute the post-obit code.
Executing beneath Pyton code returns the post-obit JSON output:
{{"access_token":"00Do0000000eP6y!AQMAQL.rIQEGcuWysvvVSGrA_IeOO7TOtZmWwqhg29sLuAUA8HPQwG8iWwIkZ7xfIqrAFCjfgkNUlcIUY.1n19OrvnPqSF4P","instance_url":"https://sgpgroups-dev-ed.my.salesforce.com","id":"https://login.salesforce.com/id/00Do0000000eP6yEAE/005o0000001jmaWAAQ","token_type":"Bearer","issued_at":"1512879770892","signature":"tdTAwz7Fv/2msLFzz4oYB4WjuwNCcpZUHL9XMFzQthM="} } Exactly what nosotros'd look. Or so we think.
Turns out, the fact that this lawmaking executes at all is considering nosotros've logged into Salesforce from our machine and we take inadvertantly completed i of two steps required for identify verification. Through the APIs information technology'south not enough to simply provide the username and countersign. We demand to practise more.
To test this (if you're upwards for it), endeavour to execute this from a different machine with a different IP address – for instance, AWS. You will go the following fault:
authentication failure - Failed: API security token required While you may find this annoying it's purposeful and important. The reality is that sometimes a username and password isn't enough. We need more protection. This error is in effect telling yous that yous're not calling from a trusted IP address.
There are three ways to set it. The like shooting fish in a barrel way, the somewhat more challenging way, and and then the right mode.
Allow'southward take a expect at the three ways. But don't utilize the first two. Seriously.
- Fix appropriate login ranges for the user profile.Assistants Setup,Manage Users,Users. Find your login name and then click the link netherProfile. In my case, this isArrangement Administrator. ClickLogin IP Rangesand so the*New button. For giggles, add together the range 0.0.0.0 to 255.255.255.255 as this will enable access from everywhere.
Hopefully you meet why this is not a good long term solution.
- Set advisable login ranges for the connected app.App Setup,Create,Apps. Click the connected app you lot created. ClickNew adjacent toIP Ranges. Unlike the IP ranges for the user profile you cannot gear up a ridiculously large range; your have to be more specific and concrete. Figure out the IP range for your host and enter it here.
This is also not a good solution although it's amend than the previous. Fight the urge to do this and let'southward look at the right option.
- Get a security token. This is the right thing to do and is called the Username-Countersign OAuth Hallmark Catamenia. Turns out, it's not hard to exercise this.Personal Setup,My Personal Data,Reset My Security Token. This will ship a new security token to you via email.
You must suspend the security token to their password. For example, if a user's countersign is "mypassword" and the security token is "XXXXXXXXXX", then the value provided for this parmeter must exist "mypasswordXXXXXXXXXX".
As you can encounter, this is not at all difficult.
Then, knowing this and proceeding with option #3, we can brand a minor change to our Python code.
Python Script:
import requests consumer_key = "YOUR_CONSUMER_KEY" consumer_secret = "YOUR_CUSTOMER_SECRET" username = "YOUR_USER_NAME" password = "YOUR_PASSWORD" organizationId = "YOUR-ORGANIZATIONID" payload = { 'grant_type': 'password', 'client_id': consumer_key, 'client_secret': consumer_secret, 'username': username, 'password': password, 'organizationId': organizationId } r = requests.postal service("https://login.salesforce.com/services/oauth2/token", headers={"Content-Type":"application/x-www-form-urlencoded"}, data=payload) impress r.content 
Salesforce Majority
Python client library for accessing the asynchronous Salesforce.com Bulk API.
Installation
pip install salesforce-majority
Authentication
To access the Majority API you need to cosign a user into Salesforce. The easiest way to do this is but to supplyusername,countersign andsecurity_token. This library will use thesimple-salesforce package to handle password based hallmark.
from salesforce_bulk import SalesforceBulk bulk = SalesforceBulk(username=username, countersign=countersign, security_token=security_token) ...
Alternatively if you run have access to a session ID and instance_url yous tin use those directly:
from urlparse import urlparse from salesforce_bulk import SalesforceBulk majority = SalesforceBulk(sessionId=sessionId, host=urlparse(instance_url).hostname) ...
Operations
The basic sequence for driving the Bulk API is:
- Create a new job
- Add one or more than batches to the task
- Close the job
- Wait for each batch to finish
Majority Query
bulk.create_query_job(object_name, contentType='JSON')
Using API v39.0 or higher, y'all can also apply the queryAll performance:
bulk.create_queryall_job(object_name, contentType='JSON')
Example
from salesforce_bulk.util import IteratorBytesIO import json job = bulk.create_query_job("Contact", contentType='JSON') batch = bulk.query(job, "select Id,LastName from Contact") majority.close_job(task) while not bulk.is_batch_done(batch): sleep(10) for upshot in bulk.get_all_results_for_query_batch(batch): consequence = json.load(IteratorBytesIO(issue)) for row in upshot: print row # dictionary rows Same case but for CSV:
import unicodecsv job = bulk.create_query_job("Contact", contentType='CSV') batch = majority.query(job, "select Id,LastName from Contact") majority.close_job(job) while not bulk.is_batch_done(batch): sleep(10) for upshot in bulk.get_all_results_for_query_batch(batch): reader = unicodecsv.DictReader(event, encoding='utf-eight') for row in reader: print row # dictionary rows Note that while CSV is the default for historical reasons, JSON should be prefered since CSV has some drawbacks including its handling of NULL vs empty string.
PK Chunk Header
If you lot are querying a large number of records you lot probably desire to turn on PK Chunking:
bulk.create_query_job(object_name, contentType='CSV', pk_chunking=True)
That will apply the default setting for chunk size. You tin use a different chunk size by providing a number of records per clamper:
bulk.create_query_job(object_name, contentType='CSV', pk_chunking=100000)
Additionally if you lot want to practise something more than sophisticated you can provide a header value:
bulk.create_query_job(object_name, contentType='CSV', pk_chunking='chunkSize=50000; startRow=00130000000xEftMGH')
Majority Insert, Update, Delete
All Bulk upload operations work the aforementioned. You set the operation when you create the chore. Then you submit one or more documents that specify records with columns to insert/update/delete. When deleting you lot should only submit the Id for each record.
For efficiency you should use thepost_batch method to post each batch of information. (Note that a batch tin have a maximum x,000 records and be 1GB in size.) Y'all pass a generator or iterator into this function and it will stream data via POST to Salesforce. For help sending CSV formatted information you can use the salesforce_bulk.CsvDictsAdapter class. It takes an iterator returning dictionaries and returns an iterator which produces CSV information.
Total example:
from salesforce_bulk import CsvDictsAdapter job = majority.create_insert_job("Account", contentType='CSV') accounts = [dict(Name="Account%d" % idx) for idx in xrange(5)] csv_iter = CsvDictsAdapter(iter(accounts)) batch = majority.post_batch(job, csv_iter) bulk.wait_for_batch(job, batch) bulk.close_job(task) print "Washed. Accounts uploaded." Concurrency manner
When creating the task, laissez passerconcurrency='Serial' orconcurrency='Parallel' to set the concurrency mode for the job.
Python is a dandy general-purpose programming language on its own, only with the help of a few popular libraries (numpy, scipy, matplotlib) it becomes a powerful environment for scientific computing.
We expect that many of yous volition have some experience with Python and numpy; for the balance of yous, this section will serve as a quick crash form both on the Python programming language and on the utilize of Python for scientific computing.
Some of you may accept previous knowledge in Matlab, in which instance nosotros also recommend the numpy for Matlab users page.
Matplotlib
Matplotlib is a plotting library. In this department give a brief introduction to thematplotlib.pyplot module, which provides a plotting system similar to that of MATLAB.
Plotting
The virtually important function in matplotlib isplot, which allows you lot to plot 2D information. Hither is a simple example:
import numpy as np import matplotlib.pyplot as plt # Compute the x and y coordinates for points on a sine curve x = np . arange ( 0 , iii * np . pi , 0.one ) y = np . sin ( 10 ) # Plot the points using matplotlib plt . plot ( x , y ) plt . show () # You must telephone call plt.prove() to make graphics appear. Running this code produces the post-obit plot:

With just a little bit of actress work we can easily plot multiple lines at once, and add a championship, legend, and axis labels:
import numpy equally np import matplotlib.pyplot as plt # Compute the ten and y coordinates for points on sine and cosine curves 10 = np . arange ( 0 , 3 * np . pi , 0.1 ) y_sin = np . sin ( x ) y_cos = np . cos ( x ) # Plot the points using matplotlib plt . plot ( x , y_sin ) plt . plot ( x , y_cos ) plt . xlabel ( 'x axis label' ) plt . ylabel ( 'y axis label' ) plt . championship ( 'Sine and Cosine' ) plt . legend ([ 'Sine' , 'Cosine' ]) plt . evidence () 
You can read much more than about theplot role in the documentation.
Subplots
You can plot dissimilar things in the same figure using thesubplot role. Here is an example:
import numpy equally np import matplotlib.pyplot as plt # Compute the x and y coordinates for points on sine and cosine curves 10 = np . arange ( 0 , three * np . pi , 0.1 ) y_sin = np . sin ( x ) y_cos = np . cos ( x ) # Fix up a subplot grid that has acme 2 and width 1, # and set the first such subplot equally active. plt . subplot ( 2 , one , ane ) # Brand the first plot plt . plot ( x , y_sin ) plt . title ( 'Sine' ) # Set the 2d subplot equally active, and brand the second plot. plt . subplot ( 2 , 1 , 2 ) plt . plot ( x , y_cos ) plt . title ( 'Cosine' ) # Show the figure. plt . testify () 
You can read much more about thesubplot function in the documentation.
Thanks!!!
Introduction
This workshop shows how toCreate andRun a Python app with psycopg2 which uses PostgreSQL based Heroku Connect

Figure ane show how the HerokuConnect Add-on interacts with Heroku Postgres and force.com behind the scenes. Make certain you have Python installed. As well, install the Heroku Toolbelt
We volition be using a bones Flask app available at flaskpy-sfdc
This app has four balance endpoints
@app.route('/') which displays Howdy world @app.route('/contacts') which fetches list of contacts from Postgres table salesforce.contact @app.road('/create_contact', methods=['POST','GET']) which creates a new contact @app.route('/contactform') which serves an HTML Form for inbound new contact details Prerequisites
This workshop assumes you accept following setup
- Heroku Login
- Heroku CLI
- git
- Salesforce Developer Edition Business relationship
Clone the Source Code
$ git clone https://github.com/salesforce888/flaskpy-sfdc Heroku Login
First download CLI, install information technology and run the following command.
Requirements File
Note : This section is for information just
Notice that the Requirements file already exists, this volition be used by Heroku to setup the dynos
$ cat requirements.txt Flask==0.10.i gunicorn==19.iii.0 itsdangerous==0.24 Jinja2==two.8 MarkupSafe==0.23 psycopg2==ii.6.1 Werkzeug==0.eleven wheel==0.24.0 Procfile
Note : This section is for information only
In that location is already a Procfile which tells the Heroku what kind of Dyno is required and the source for the application.
spider web: gunicorn app:app --log-file - DB Initialization
Note : This section is for information merely
Nosotros will parsing the DATABASE_URL surroundings variable to connect to PostgreSQL database. The PostgreSQL Python driver is already configured in the requirements file.
Steps are
- Parse DATABASE_URL into variable
url - Create a connexion string
dbfrom the parsedurl. - Create a Database connection
conn. - Open a Database cursor
cur.
url = urlparse.urlparse(os.environ.become('DATABASE_URL')) db = "dbname=%s user=%due south countersign=%s host=%s " % (url.path[1:], url.username, url.password, url.hostname) schema = "schema.sql" conn = psycopg2.connect(db) cur = conn.cursor() Flask Controller
Annotation : This section is for data but
app.py is the main controller for our applications and lawmaking listing below shows the implementation of diverse use cases
List Contacts
@app.route('/contacts') def contacts(): attempt: cur.execute("""SELECT name from salesforce.contact""") rows = cur.fetchall() response = '' my_list = [] for row in rows: my_list.append(row[0]) return render_template('template.html', results=my_list) except Exception every bit due east: print(e) return [] Create Contacts
Implementation of/createcontactform endpoint
@app.road('/contactform') def contactform(): return render_template('contactform.html') Implementation of/create_contact endpoint.
@app.road('/create_contact', methods=['POST','GET']) def create_contact(): endeavour: if request.method == "POST": first_name = request.form["kickoff-proper noun"] last_name = request.class["final-name"] email = request.course["email"] app.logger.info(first_name) argument = "insert into salesforce.contact(firstname, lastname, email) values ('" \ + first_name + "','" + last_name + "','" + email + "');" cur.execute(statement) conn.commit() errors = [] return render_template('issue.html', errors=errors, firstname=first_name, lastname=last_name) except Exception equally e: print(due east) return [] Deploying to Heroku
Before moving on, create a Heroku account and run$ heroku login command to login to your created heroku account.
$ heroku create $ git push heroku main $ heroku open Add PostgreSQL Add-on
Add Postgress Add together-On as shown below.
$ heroku addons:create heroku-postgresql:hobby-dev Add Heroku Connect Improver
Configure Heroku Connect Add-On. Command below configures Herok-Connect Addition to the application.
$ heroku addons:create herokuconnect Configure Heroku Connect Addition
- Setup Connection
- Enter Schema Name : This is the schema name underwhich database will exist created.
- Trigger OAuth
- Enter Salesforce.com developer business relationship credentials
- Create Mappings
- Create Mappings Contacts : Choose the fields in Salesforce Schema which demand to exist mapped to Postgres Database in the application.
- Write Enable : Make sure yous enable
Write to Salesforce any updates to your databasebank check box - Click on settings to go the database details and take URI as a DATABASE_URL.
- Explore Contacts in the Dashboard
Finally information technology looks like this:

Home Page

Contact List
Browse to URLhttp://{your-app-proper name}.herokuapp.com/contacts to come across the listing of contact names.

Create a New Contact
Browse to URLhttp://{your-app-name}.herokuapp.com/createcontactform to run into the list of contact names.

Optional Step Show Contacts Locally
Prerequisites
- Python two.seven
- pip
- virtualenv
- PostgreSQL client (Optional if you lot want to run the application locally)
- Install Virtual EnvironmentGo to the awarding Folder
flask-psycopg2-sampleand install a virtual environment in it.$ cd flask-psycopg2-v2 $ virtualenv venv $ source venv/bin/activate
- Install Dependencies
$ pip install flask gunicorn psycopg2
- Configure the DATABASE_URL in the local surround
$ heroku config === fast-sands-40695 Config Vars DATABASE_URL: postgres://<user_name>:<countersign>@<ipaddress>.compute-1.amazonaws.com:5432/<database_name> HEROKUCONNECT_URL: DATABASE_URL:salesforce
- Export DATABASE_URL
$ export DATABASE_URL=postgres://<user_name>:<countersign>@<ipaddress>.compute-1.amazonaws.com:5432/db
Open the post-obit URL
http://localhost:5000/contactsyous should be able see the contacts. - Run the app using the following control
Your app should at present be running on localhost:5000
Summary
In this workshop we learnt how to configure a Python Flask Application to work with Heroku Connect. We used Psycopg2 driver for talking to the PostgreSQL database deployed on Heroku.
Appendix:
Executing using PyCharm
-
- Install the Pycharm. And add your directory every bit a project to PyCharm.
- Ready the Surround variable as
DATABASE_URL=postgres://<user_name>:<countersign>@<ipaddress>.compute-1.amazonaws.com:5432/<database_name>by following the path File > Default Settings
import os import psycopg2 from flask import Flask, render_template #urlparse libraryt won't work in python 2.vii, we need to download urlparse2 and suspend urlparse library import urlparse2 #Appending urlparse library from urlparse2 from urlparse2 import urlparse import logging from logging.handlers import RotatingFileHandler from flask import request url = urlparse2.urlparse('xxxxxxxxxxxxxxxx(postgres DB URL') db = "dbname=%due south user=%s password=%s host=%s " % (url.path[i:], url.username, url.countersign, url.hostname) schema = "schema.sql" conn = psycopg2.connect(db) cur = conn.cursor() app = Flask(__name__) @app.route('/') def dwelling(): #render 'Hullo World!' return render_template('home.html') @app.road('/contactform') def contactform(): return render_template('contactform.html') @app.route('/contacts') def contacts(): effort: cur.execute("""SELECT firstname, lastname, email from salesforce.contact""") rows = cur.fetchall() response = '' my_list = [] for row in rows: my_list.suspend(row) return render_template('contact_list.html', results=my_list) except Exception as east: impress(e) return [] @app.road('/create_contact', methods=['POST','GET']) def create_contact(): try: if request.method == "POST": first_name = request.form["first-name"] last_name = request.form["terminal-proper name"] email = request.grade["email"] app.logger.info(first_name) statement = "insert into salesforce.contact(firstname, lastname, email) values ('" \ + first_name + "','" + last_name + "','" + email + "');" cur.execute(argument) conn.commit() errors = [] render render_template('result.html', errors=errors, firstname=first_name, lastname=last_name) except Exception as due east: print(eastward) return [] if __name__ == '__main__': handler = RotatingFileHandler('foo.log', maxBytes=10000, backupCount=10) handler.setLevel(logging.INFO) app.logger.addHandler(handler) app.run()
Results:
Click onapp.py and run the app.

Open the post-obit URLhttp://localhost:5000/contacts or the URL which yous'll get while running programme (Viz: http://127.0.0.1:5000/) you should be able run across the contacts.
Click on ContactList
Click on Create contact
Cheers!!

In this post we'll explore how you tin can implement a interactive salesforce graphing in python using plotly.
We can't display a chart directly in python,however we tin achieve with the help of pandas and plotly libraries.
To achieve this,we need to register on plotly because nautical chart is going to shop and brandish in plotly website and from there we can download into our local system or we tin can share it with business users.
What y'all'll demand:
- Salesforce Username/Password/Security Token (signup for Developer org here).
- Python installed on your local estimator with pip working (python windows / osx / linux – pip comes with Python 2.7x+).
- Plotly account
Now we have the formalities out the way lets go cracking.
Registering on plotly website:
- Please register on plotly website

2. Click on Settings and yous encounter user name and api fundamental under API keys section.
delight not downwardly these 2 parameters to authenticate plotly from python.

Python Script
Now for the fun bit first up we need to prepare our local environment and so that nosotros can be sure before copying onto our remote surroundings that information technology'due south all working.
- Open Final or Command Prompt on your computer.
- If your familiar with virtualenv then setup and activate it.
- Now your ready to install simple_salesforce, type:
pip install simple_salesforce
-
The same manner, Please install pandas, numpy, requests libraries using pip
- If your python environment is setup correctly that should exist it your now prepare to build out your script.
- Every bit with other guides I've tried to comment the code in english so y'all can copy/paste and follow what each line is doing. Using an editor like Sublime create a file or utilise pycharm editor as per your favored (viz. programmer) choice.
#import pandas and numpy import pandas as pd import numpy as np from collections import Counter import requests import plotly.plotly every bit py import plotly.tools as tls #plotly credentials under API settings tls.set_credentials_file(username='xxxxxx',api_key='xxxxxxxxxxx') from plotly.graph_objs import * #import salesforce Rest Client from simple_salesforce import Salesforce session = requests.Session() # manipulate the session instance (optional) sf = Salesforce( username='xxxxxx', countersign='xxxxxx', organizationId='xxxxx',session=session) lead_for_status = sf.query('select id,Status,Owner.name from Pb ') Statuses = [10['Status']for 10 in lead_for_status['records']] status_counts=Counter(Statuses) information=Data([Bar(x=status_counts.keys(),y=status_counts.values())]) py.iplot(data,filename='lead_dist').
- At present relieve this file as plotlysfdc.py
So we take the file, lets now doing a quick examination, from your terminal.
python plotlysfdc.py
That's it now only and then long as you lot have followed the instruction here, go to plotly account and click on dwelling house page, you lot will come across below output files generated in plotly, one with lead_dist dashboard and another is lead_dist filigree file.

The intention of the tutorial is not just to make the Estimator but also to understand the how GUI objects are created in Python.
At the end of this tutorial, I will share the complete code for Python calculator. Y'all can copy-paste and use it.
If your intention is to larn the Python, merely don't re-create the lawmaking. Follow this article pace past footstep, you can write your own code. Trust me you volition learn something amazing.
So let'south kickoff.
For creating GUI, nosotros are usingPyQt4.QtGui parcel. It provides inbuilt functionality to create GUI objects like text area, button, labels…
If you don't havePyQt4.QtGui package installed on your system, you tin download and install with this unproblematic command.
Annotation: While installing , please lookout man this link
sudo apt-get install python-qt4
Let'south showtime by because the requirement to create calculator…
For our lawmaking to brand the figurer, we need…
- 2 text fields to take the user inputs
- 4 buttons to perform four different arithmetic operations like add together, subtract, divide and multiply
- 1 label is to display the effect

How to create these GUI objects in Python?
Code for Creating text field for user input
txtArea1 = QLineEdit("", widget) txtArea2 = QLineEdit("", widget) Code for Creating Clickable GUI buttons
btnAdd = QPushButton("Add", widget) btnSub = QPushButton("Subtract", widget) btnDiv = QPushButton("Divide", widget) btnMul = QPushButton("Multiply", widget) Python Code for Plotting GUI objects in Widget
In that location is ane widget, inside which nosotros are displaying all the GUI objects.
To display the objects in the widget, we have to position them using…
- widget.resize()
- widget.motility()
All the GUI objects will be configured inside theinit() function. It is the first function to be chosen.
Based on the push user clicks on, it will call the respective function.
For instance, if the user clicks on themultiplication push, information technology callsmultiplication()function. It reads the value from ii text fields and performs the multiplication operation.
Reading User Input Values from Text Field:
The value in input text field is in the text format and you lot need to convert it into an integer before performing arithmetic operations.
This is a elementary line of Python lawmaking nosotros are using to convert text to an integer.
num1 = int(txtArea1.text()) num2 = int(txtArea2.text())
Performing Arithmetics Functioning Based on User Input:
Perform the arithmetics operation on user input num1 and num2 is pretty piece of cake.
Write a dedicated function for each of the arithmetic operation. These functions return the output to the caller.
Brandish Python Calculator Outcome:
Assign the output to the label object using label.setText().
characterization.setText("Output: "+str(num1 * num2)) That'south it. If you take the other programming languages, it is not and so much piece of cake to create GUI, but the Python does it with ease.
Now here information technology is you are looking for…
Lawmaking for GUI Estimator in Python
Simply copy and save it in python file. Run it.
import sys
from PyQt4.QtGui import *
app = QApplication(sys.argv)
widget = QWidget()
label = QLabel("", widget)
btnAdd = QPushButton( "Add together" , widget)
btnSub = QPushButton( "Subtract" , widget)
btnDiv = QPushButton( "Carve up" , widget)
btnMul = QPushButton( "Multiply" , widget)
txtArea1 = QLineEdit("", widget)
txtArea2 = QLineEdit("", widget)
def init():
widget.resize( 300 , 300 )
widget.motility( 300 , 300 )
widget.setWindowTitle( 'Estimator' )
widget.bear witness()
txtArea1.motility( 20 , 10 )
txtArea1.show()
txtArea2.move( 20 , sixty )
txtArea2.show()
characterization.setText("")
characterization.motion( 20 , 110 )
label.show()
btnAdd.setToolTip( 'Improver' )
btnAdd.move( xx , 160 )
btnAdd.clicked.connect(addition)
btnAdd.show()
btnSub.setToolTip( 'Subtraction' )
btnSub.move( 110 , 160 )
btnSub.clicked.connect(subtraction)
btnSub.show()
btnDiv.setToolTip( 'Division' )
btnDiv.move( 20 , 210 )
btnDiv.clicked.connect(division)
btnDiv.show()
btnMul.setToolTip( 'Multiplication' )
btnMul.move( 110 , 210 )
btnMul.clicked.connect(multiplication)
btnMul.show()
def addition():
num1 = int (txtArea1.text())
num2 = int (txtArea2.text())
label.setFixedWidth( 200 )
label.setText( "Improver: " + str (num1 + num2))
def subtraction():
num1 = int (txtArea1.text())
num2 = int (txtArea2.text())
label.setFixedWidth( 200 )
label.setText( "Subtraction: " + str (num1 - num2))
def multiplication():
num1 = int (txtArea1.text())
num2 = int (txtArea2.text())
label.setFixedWidth( 200 )
label.setText( "Multiplication: " + str (num1 * num2))
def division():
num1 = int (txtArea1.text())
num2 = int (txtArea2.text())
label.setFixedWidth( 200 )
label.setText( "Division: " + str (num1 / num2))
if __name__ = = "__main__" :
init()
app.exec_()
Y'all tin can change the field in the code to sympathize and heighten the GUI for the calculator.
You tin enhance this estimator past various ways…
- Add numeric button and so that you can go the values past clicking on the button instead of manually typing in the text surface area.
- Add together more arithmetic performance such equally log, trigonometric part. Write a separate part for each operation and set up one push for each operation.

In this post we'll explore how you can implement a very simple website alive check using python(urllib2) and storing your status/results in Salesforce(simple_salesforce). There are many applications that tin can provide this service only I fancied a bit of fun. And love the idea of a dashboard in Salesforce to brandish some other metric "100% uptime for web services".
What you'll need:
- Salesforce Username/Password/Security Token (signup for Programmer org here).
- Python installed on your local computer with pip working (python windows / osx / linux – pip comes with Python 2.7x+).
- Amazon AWS Account (sign up here).
- Putty / Puttygen (download them hither – this is used for getting access to a remote server and used in the AWS tutorial if your on windows)
- A piffling knowledge of Creating Objects/Fields in Salesforce – if not head over to Trailhead showtime and consummate this Project (Build a Battle Station – you'll love it simply don't forget to come up back).
- A piffling knowledge of Python – non essential the script I'yard sharing just works but yous may want to aggrandize it.
- An understanding of CRON Jobs (read hither)
Now we have the formalities out the way lets get cracking.
Setup Salesforce
- Login to Salesforce you need to create two objects for storing information in
- Object 1
- Characterization = Website
- Pluaral Characterization = Websites
- Object Name = Website
- Description = An object for storing website names and urls
- Tape Name = Website Name
- Allow Reports = TRUE
- Launch New Custom Tab Sorcerer after saving this custom object = true
- Relieve
- At present you need to add together ii custom fields
- Name = URL / API Proper noun = URL__c / Data type = URL(255) / Required = Truthful / Description = 'Website URL for tracking'
- Proper name = Active / API Proper noun = Active__c / Information blazon = Checkbox / Default = Truthful / Description = 'A manner of deactivating a website from existence checked'
- Object 2
- Label = Website Status
- Pluaral Label = Website Status
- Object Name = Website_Status
- Clarification = An object for storing your status updates for each website
- Allow Reports = TRUE
- Save
- At present yous need to add a few custom fields
- Proper noun = Status / API Name = Status__c / Information type = Checkbox / Default = Imitation / Description = 'A confirmation flag for confirming that the site was alive'
- Name = Condition Message / API Proper name = Status_Message__c / Information blazon = TEXT(255) / Description = 'Storing a status message mainly for errors'
- Proper noun = Month / API Name = 'Month__c / Data type = Formula(text) / Clarification = 'Displaying the calendar month that entry was created for matrix reporting) / Formula = Instance(Month( datevalue(CreatedDate) ), 1, "January", 2, "February", iii, "March", 4, "April", 5, "May", 6, "June", vii, "July", 8, "Baronial", nine, "September", 10, "October", 11, "Nov", 12, "December", "None")
- Proper name = Twelvemonth / API Name = 'Year__c' / Data type = Formula(text) / Clarification = 'The yr the condition was added to salesforce' / Formula = text(twelvemonth(datevalue(CreatedDate)))
- Crate a lookup relationship field with website object, Master_Website__c.
At this point you have created the basics for storing records in your org, now head to your Website tab and add a website URL and marking information technology as active.
Now you could create some reports (these records can display nicely in a matrix report with a chart if yous add together a Uptime(%) formula to divide sum of status / record count) simply there isn't whatsoever data in at that place yet so it'll look boring. Create some data and cheque once how information technology looks like.
Python Script
Now for the fun scrap first upwards nosotros need to gear up our local surroundings so that we can be sure before copying onto our remote environment that information technology'due south all working.
- Open Terminal or Command Prompt on your computer.
- If your familiar with virtualenv then setup and activate it.
- Now your ready to install simple_salesforce, type:
pip install simple_salesforce
.
- If your python environment is setup correctly that should be it your at present prepare to build out your script.
- Equally with other guides I've tried to annotate the lawmaking in english so you lot tin copy/paste and follow what each line is doing. Using an editor like Sublime create a file or utilise pycharm editor as per your favored (viz. programmer) choice.
#!/usr/bin/python # import urllib2 - https://docs.python.org/2/library/urllib2.html import urllib2 # import simple salesfore from simple_salesforce - https://pypi.python.org/pypi/simple-salesforce from simple_salesforce import Salesforce # setup your login details salesforce_login = {'username':'yourusername', 'password':'yourpassword', 'security_token':'yourkey'} # now connect to Salesforce sf = Salesforce(**salesforce_login) # at present setup to loop through the records stores in the website for row in sf.query("SELECT Id, Name, URL__c FROM Website__c WHERE Active__c=true")["records"]: # assign the sfid for this row to ensure that when you populate the Website_Status__c object it's linked to the right website sfid = row["Id"] # try and see if yous can connect attempt: # define the actual url for th test websiteurl = row["URL__c"] # use urllib2 to try and open the website urllib2.urlopen(websiteurl) # considering this all went well we're going to populate the Website_Status__c with a Active Confirmation sf.Website_Status__c.create({'Master_Website__c': sfid,'Status__c': i,'Status_Message__c':'Site Up'}) # catch a HTTPError like 401/500/303 and log it except urllib2.HTTPError, east: # become the error details for storing in salesforce errorcode = due east.code # unlike earlier we'll put an error status in with the lawmaking sf.Website_Status__c.create({'Master_Website__c': sfid,'Status__c': 0,'Status_Message__c':errorcode}) # catch wnen a bum url is stored in your salesforce and error out lile htp://ww.jondo.com - error url except urllib2.URLError, due east: # go the mistake details for storing in salesforce errorcode = e.args # again lets put in an error status for reference after sf.Website_Status__c.create({'Master_Website__c': sfid,'Status__c': 0,'Status_Message__c':errorcode}).
- Now save this file as websitechecker.py
So nosotros accept the file, lets now doing a quick test, from your terminal.
python websitechecker.py
That'due south information technology now just so long as you have followed the education here, go to Salesforce and open your Website, y'all should run into a related tape with a status attached.

I've run information technology a few times so I could play about with the reports I mentioned earlier.
Amazon EC2 Setup
Instead of me taking you lot through every step I thought I'd only share a link to Amazon's tutorial seeing as I'm certain this volition slightly modify over the years but this script and Salesforce won't modify that much.
- Follow this Guide and setup with the following:
- Image Blazon = Amazon Linux AMI.
- Example Type = t2.micro (costless tier elligible).
- Take all defaults until security grouping setup.
- Requite your group a name and clarification.
- Set SSH to MyIP – this volition ensure yous can access the server.

- At this point I would hope that you have a putty session running and are at a command line.
- Now type in the follow commands to setup the instance:
- sudo yum update
- expect for it to prompt you and so press y
- sudo pip install simple_salesforce
- nano websitechecker.py
- at present paste in the python script above
- press ctrl+o to save and edit nano
- now type in chmod +x websitechecker.py to make your script executable
- now type crontab -e
- printing i – to insert
- at present type in the following to run this script every 5 mins:
- */5 * * * * /abode/ec2-user/websitechecker.py
- now restart cron
- sudo service crond restart
- sudo yum update
Now site and await ten mins and so check in Salesforce to see if your records have been created.
So that's how you monitor a website in a very uncomplicated and crude way using python and salesforce.
Alarm – if you add 100's of URL'southward your going to use a lot of API calls for every 5 mins you lot're using 1 API but checking for a website. The each site you're checking is 288 API calls a 24-hour interval. That'southward also going to be the aforementioned number of records created in your org each twenty-four hour period.
Boosted means, ideas for expanding this project
- Process Builder – Email Notifications/Button Notifications/Churr Messages/Custom Apex(if twilio installed call send an SMS).
- Reporting Snapshot – Then you tin can clear downwards data and go on the key daily / weekly historical information instead of each record. (keeping downward your information volumes)
- SNMP – (here/)
- Ping –(here)
- Website Response Time (here)
- Login Credentials (here)
Simple Salesforce is a bones Salesforce.com Remainder API client built for Python two.6, 2.7, 3.3 and 3.4. The goal is to provide a very depression-level interface to the REST Resource and Noon API, returning a lexicon of the API JSON response.
You lot tin can detect out more regarding the format of the results in the Official Salesforce.com REST API Documentation
At that place are ii means to proceeds access to Salesforce
The beginning is to simply pass the domain of your Salesforce instance and an access token straight toSalesforce()
For instance:
from simple_salesforce import Salesforce sf = Salesforce(instance = 'na1.salesforce.com' , session_id = ' ' ) If you accept the total URL of your instance (perhaps including the schema, equally is included in the OAuth2 request procedure), y'all tin can laissez passer that in instead usinginstance_url:
from simple_salesforce import Salesforce sf = Salesforce(instance_url = 'https://na1.salesforce.com' , session_id = ' ' ) There are also two means of hallmark, one that uses username, countersign and security token and the other that uses IP filtering, username, password and organizationId
To login using the security token method, but include the Salesforce method and pass in your Salesforce username, password and token (this is unremarkably provided when y'all change your countersign):
from simple_salesforce import Salesforce sf = Salesforce(username = 'myemail@example.com' , password = 'password' , security_token = 'token' ) To login using IP-whitelist Organization ID method, simply use your Salesforce username, countersign and organizationId:
from simple_salesforce import Salesforce sf = Salesforce(password = 'password' , username = 'myemail@case.com' , organizationId = 'OrgId' ) If yous'd like to enter a sandbox, simply addsandbox=Truthful to yourSalesforce() telephone call.
For example:
from simple_salesforce import Salesforce sf = Salesforce(username = 'myemail@example.com.sandbox' , password = 'password' , security_token = 'token' , sandbox = True) Notation that specifying if yous want to apply a sandbox is only necessary if you are using the built-in username/countersign/security token hallmark and is used exclusively during the authentication stride.
If yous'd like to keep rail where your API calls are coming from, simply addclient_id='My App' to yourSalesforce() call.
from simple_salesforce import Salesforce sf = Salesforce(username = 'myemail@example.com.sandbox' , countersign = 'password' , security_token = 'token' , sandbox = True, client_id = 'My App' ) ref Links:
https://developer.salesforce.com/blogs/developer-relations/2014/01/python-and-the-forcefulness-com-remainder-api-simple-simple-salesforce-example.html
https://github.com/uncomplicated-salesforce/simple-salesforce
SFDC Bulk Api Python:
https://github.com/heroku/salesforce-majority
https://plot.ly/python/salesforce/
https://python.swaroopch.com/
Open up your pycharm editor and try below program to perform data management activities.
from simple_salesforce import Salesforce import requests session = requests.Session() # dispense the session instance (optional) #Login Here sf = Salesforce( username='xxxxxxxxx', password='xxxxxx', organizationId='xxxxxxxx',session=session) records =sf.query("SELECT Id, Name, E-mail FROM Contact where id = '003o000000i4n5y'") records = records['records'] #print spider web page impress ("Content-type: text/html") print ("<html><trunk>") impress ("<h1>SELECT Id, Name, E-mail FROM Contact</h1>") impress("<tabular array>") print ("<tr><td><b>Name</b></td><td><b>Email</b></td></tr>") for record in records: print ("<tr><td>"+tape['Name']+"</td><td>"+record['Email']+"</td></tr>") impress ("</tabular array>") print ("</trunk></html>") Get-go Steps
Using The Interpreter Prompt
print("Hullo Earth") $ python3 Python 3.half dozen .0 (default, Jan 12 2017, 11:26:36) [GCC four.ii .1 Compatible Apple tree LLVM 8.0 .0 (clang-800.0 .38)] on darwin Type "assist", "copyright", "credits" or "license" for more information. >>> print("Hullo World") Hello World How to Quit the Interpreter Prompt
Choosing An Editor
PyCharm
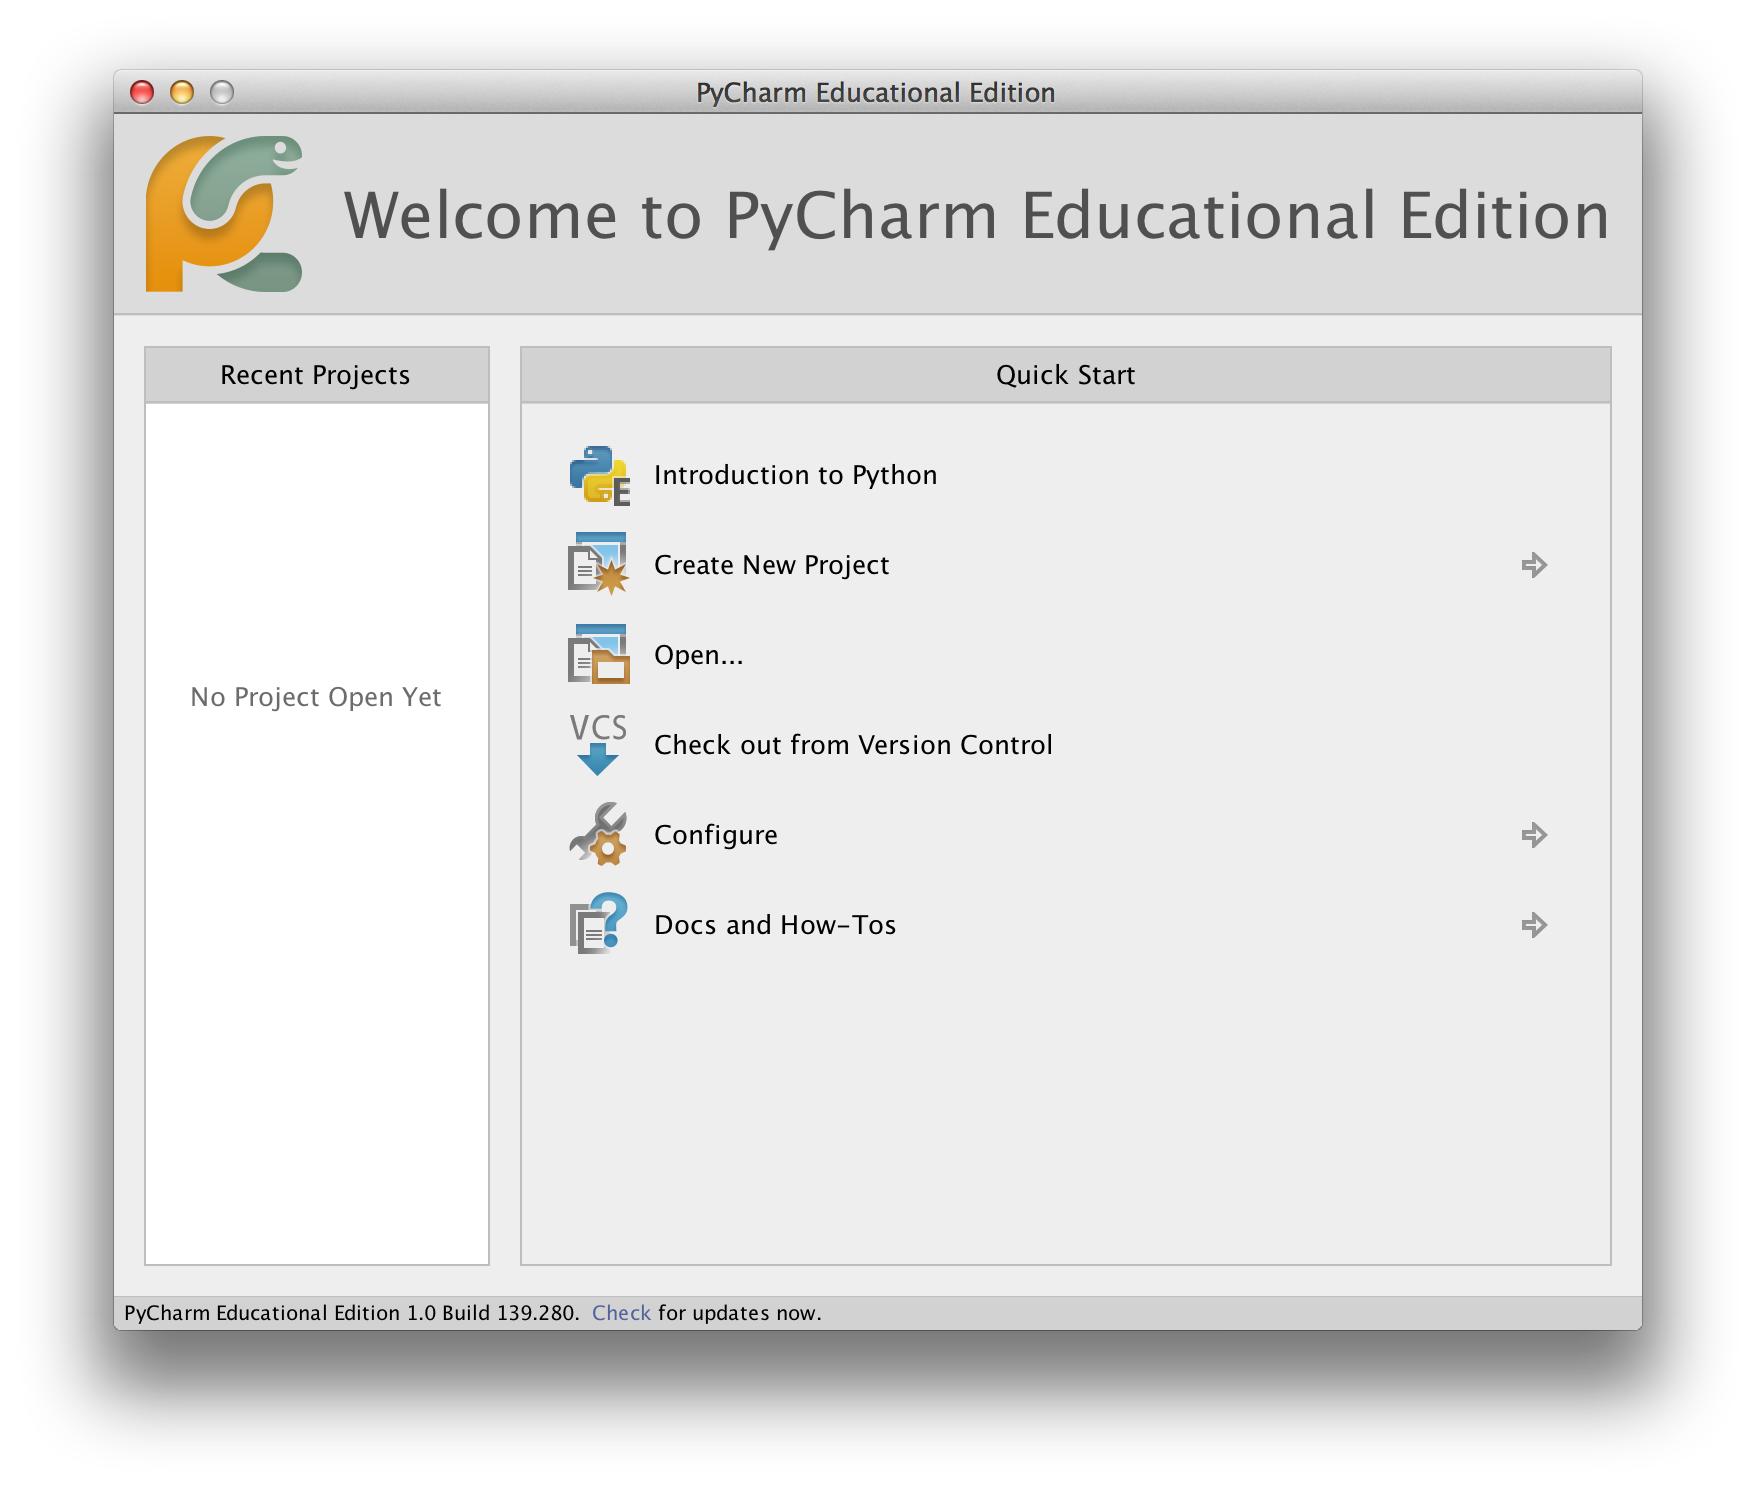
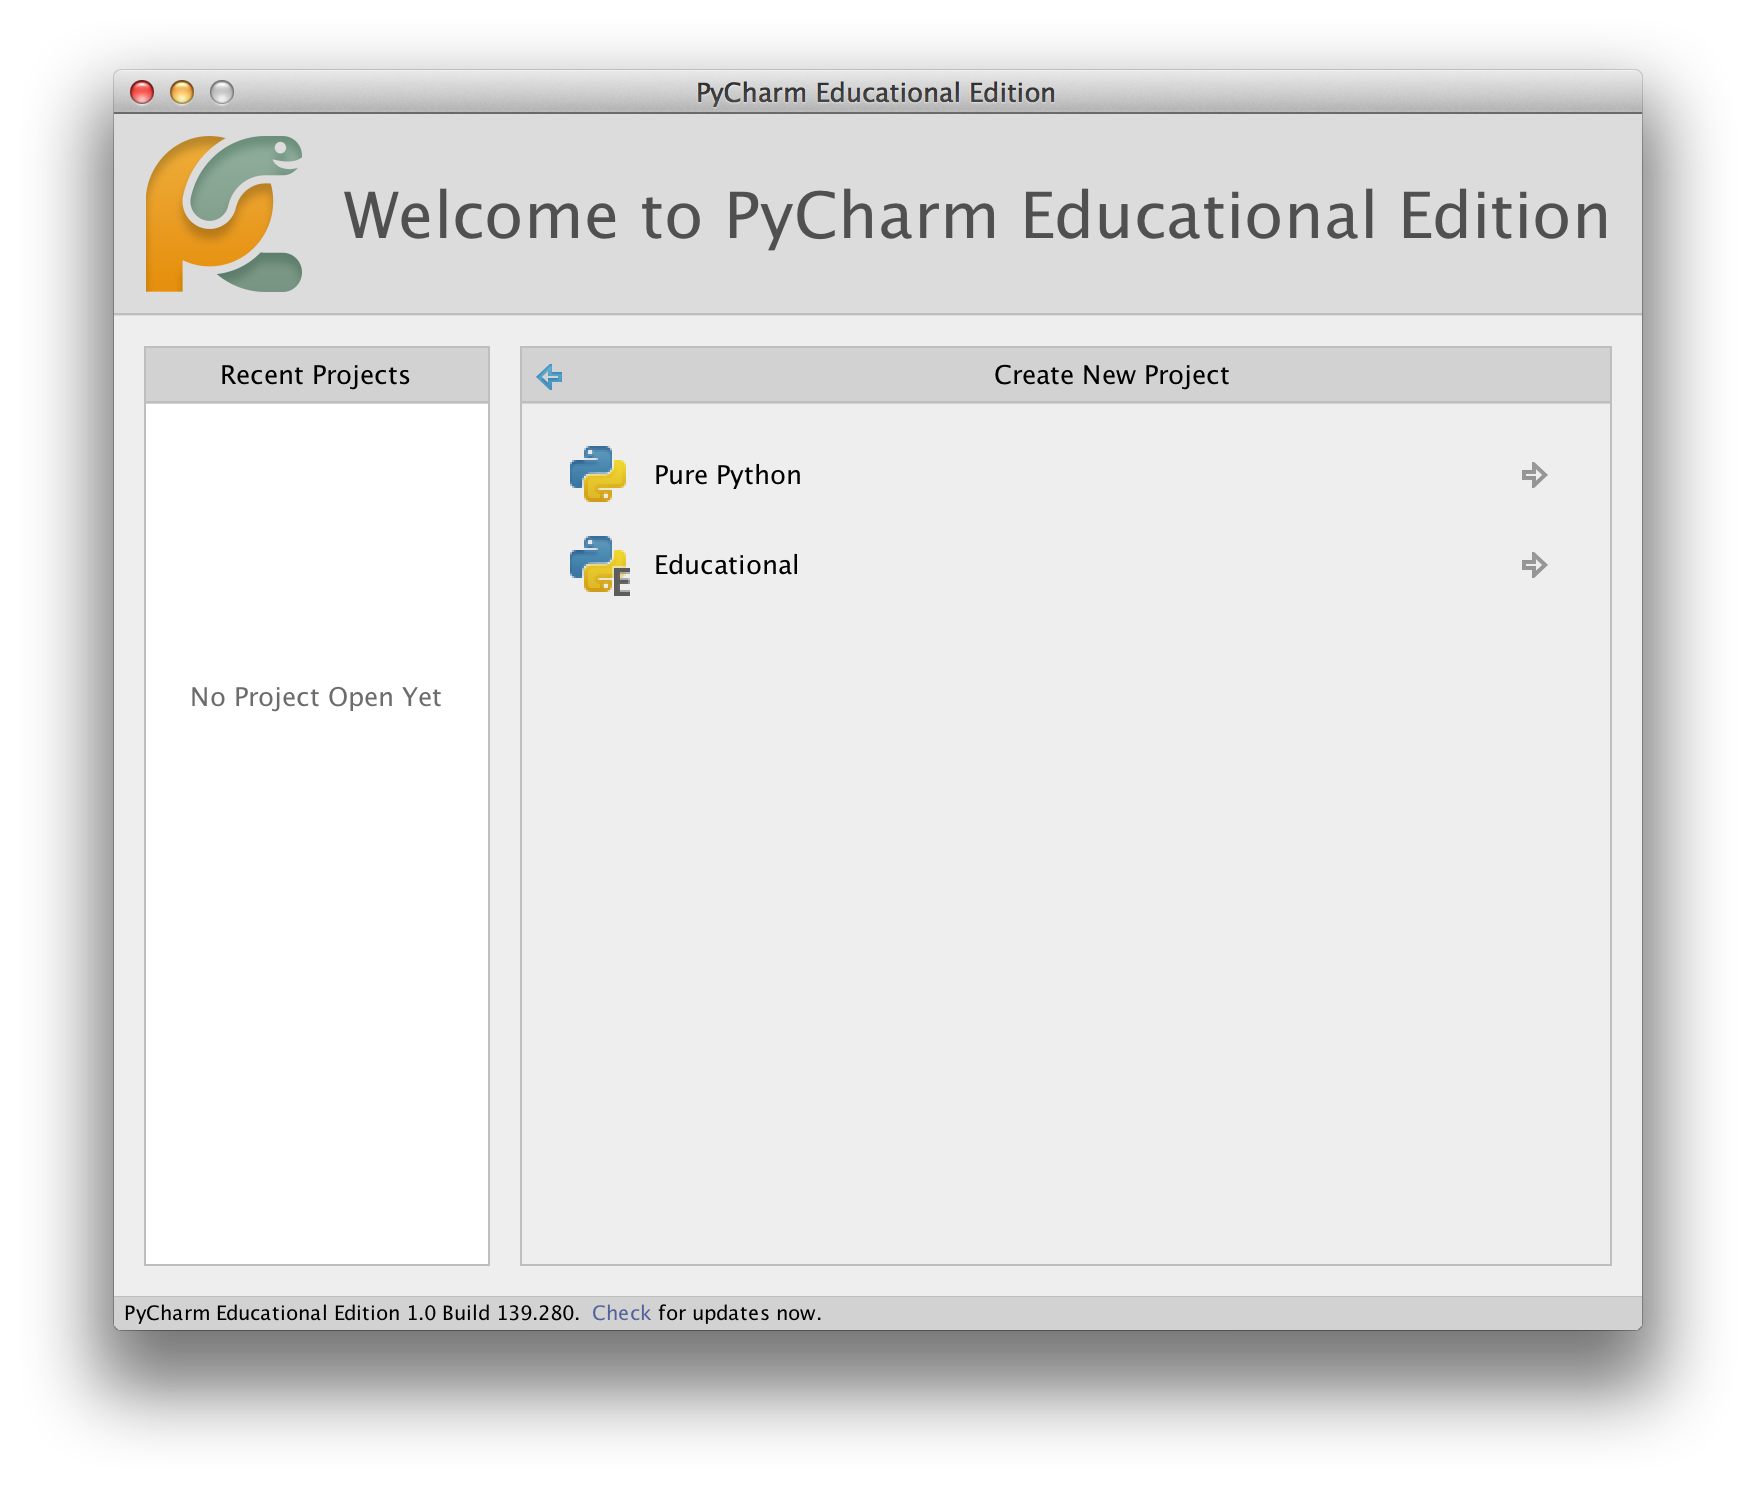
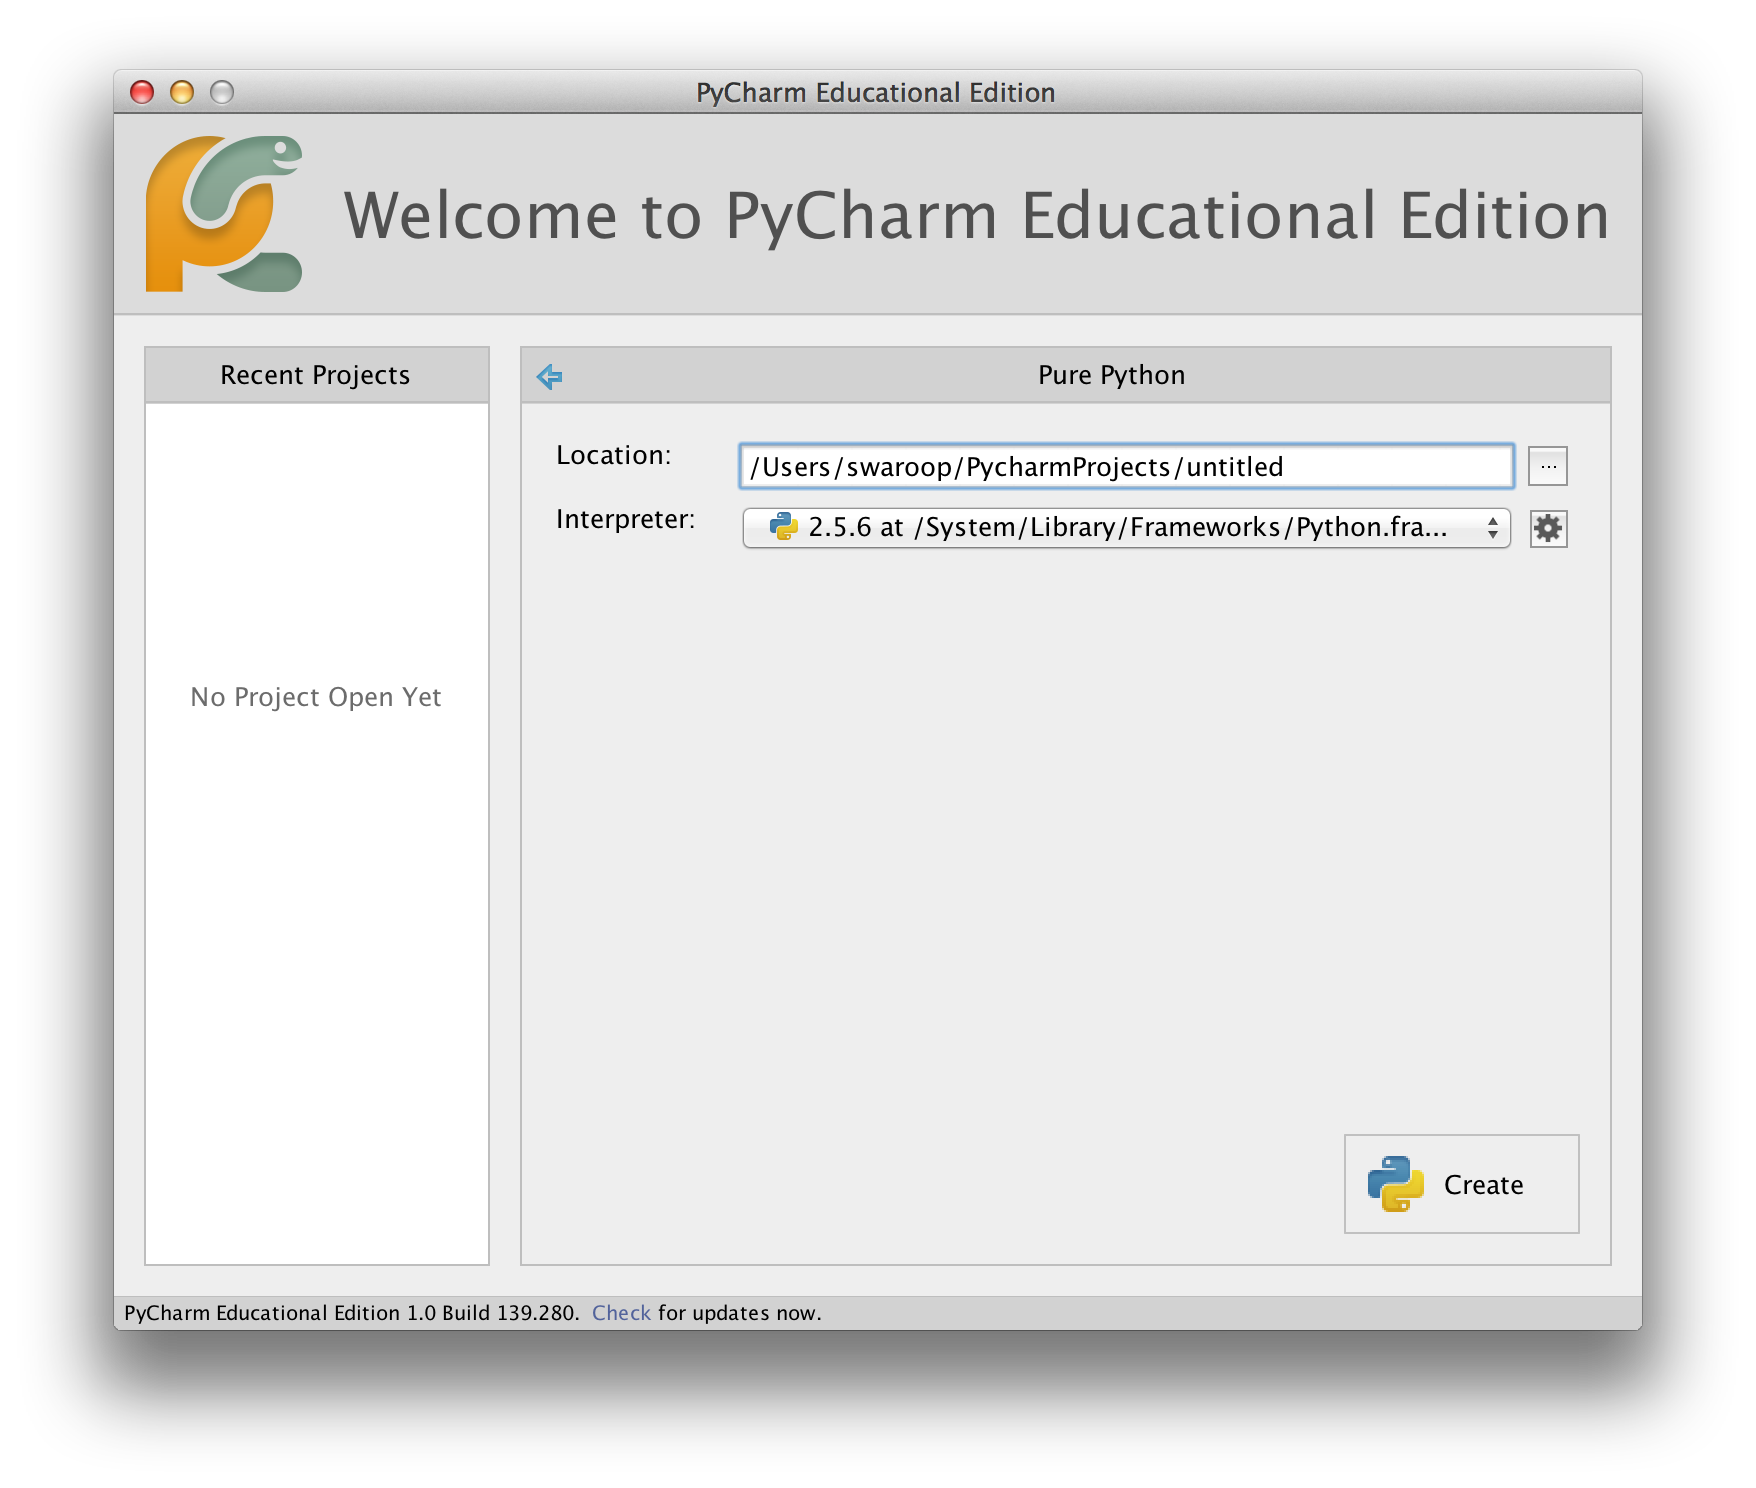
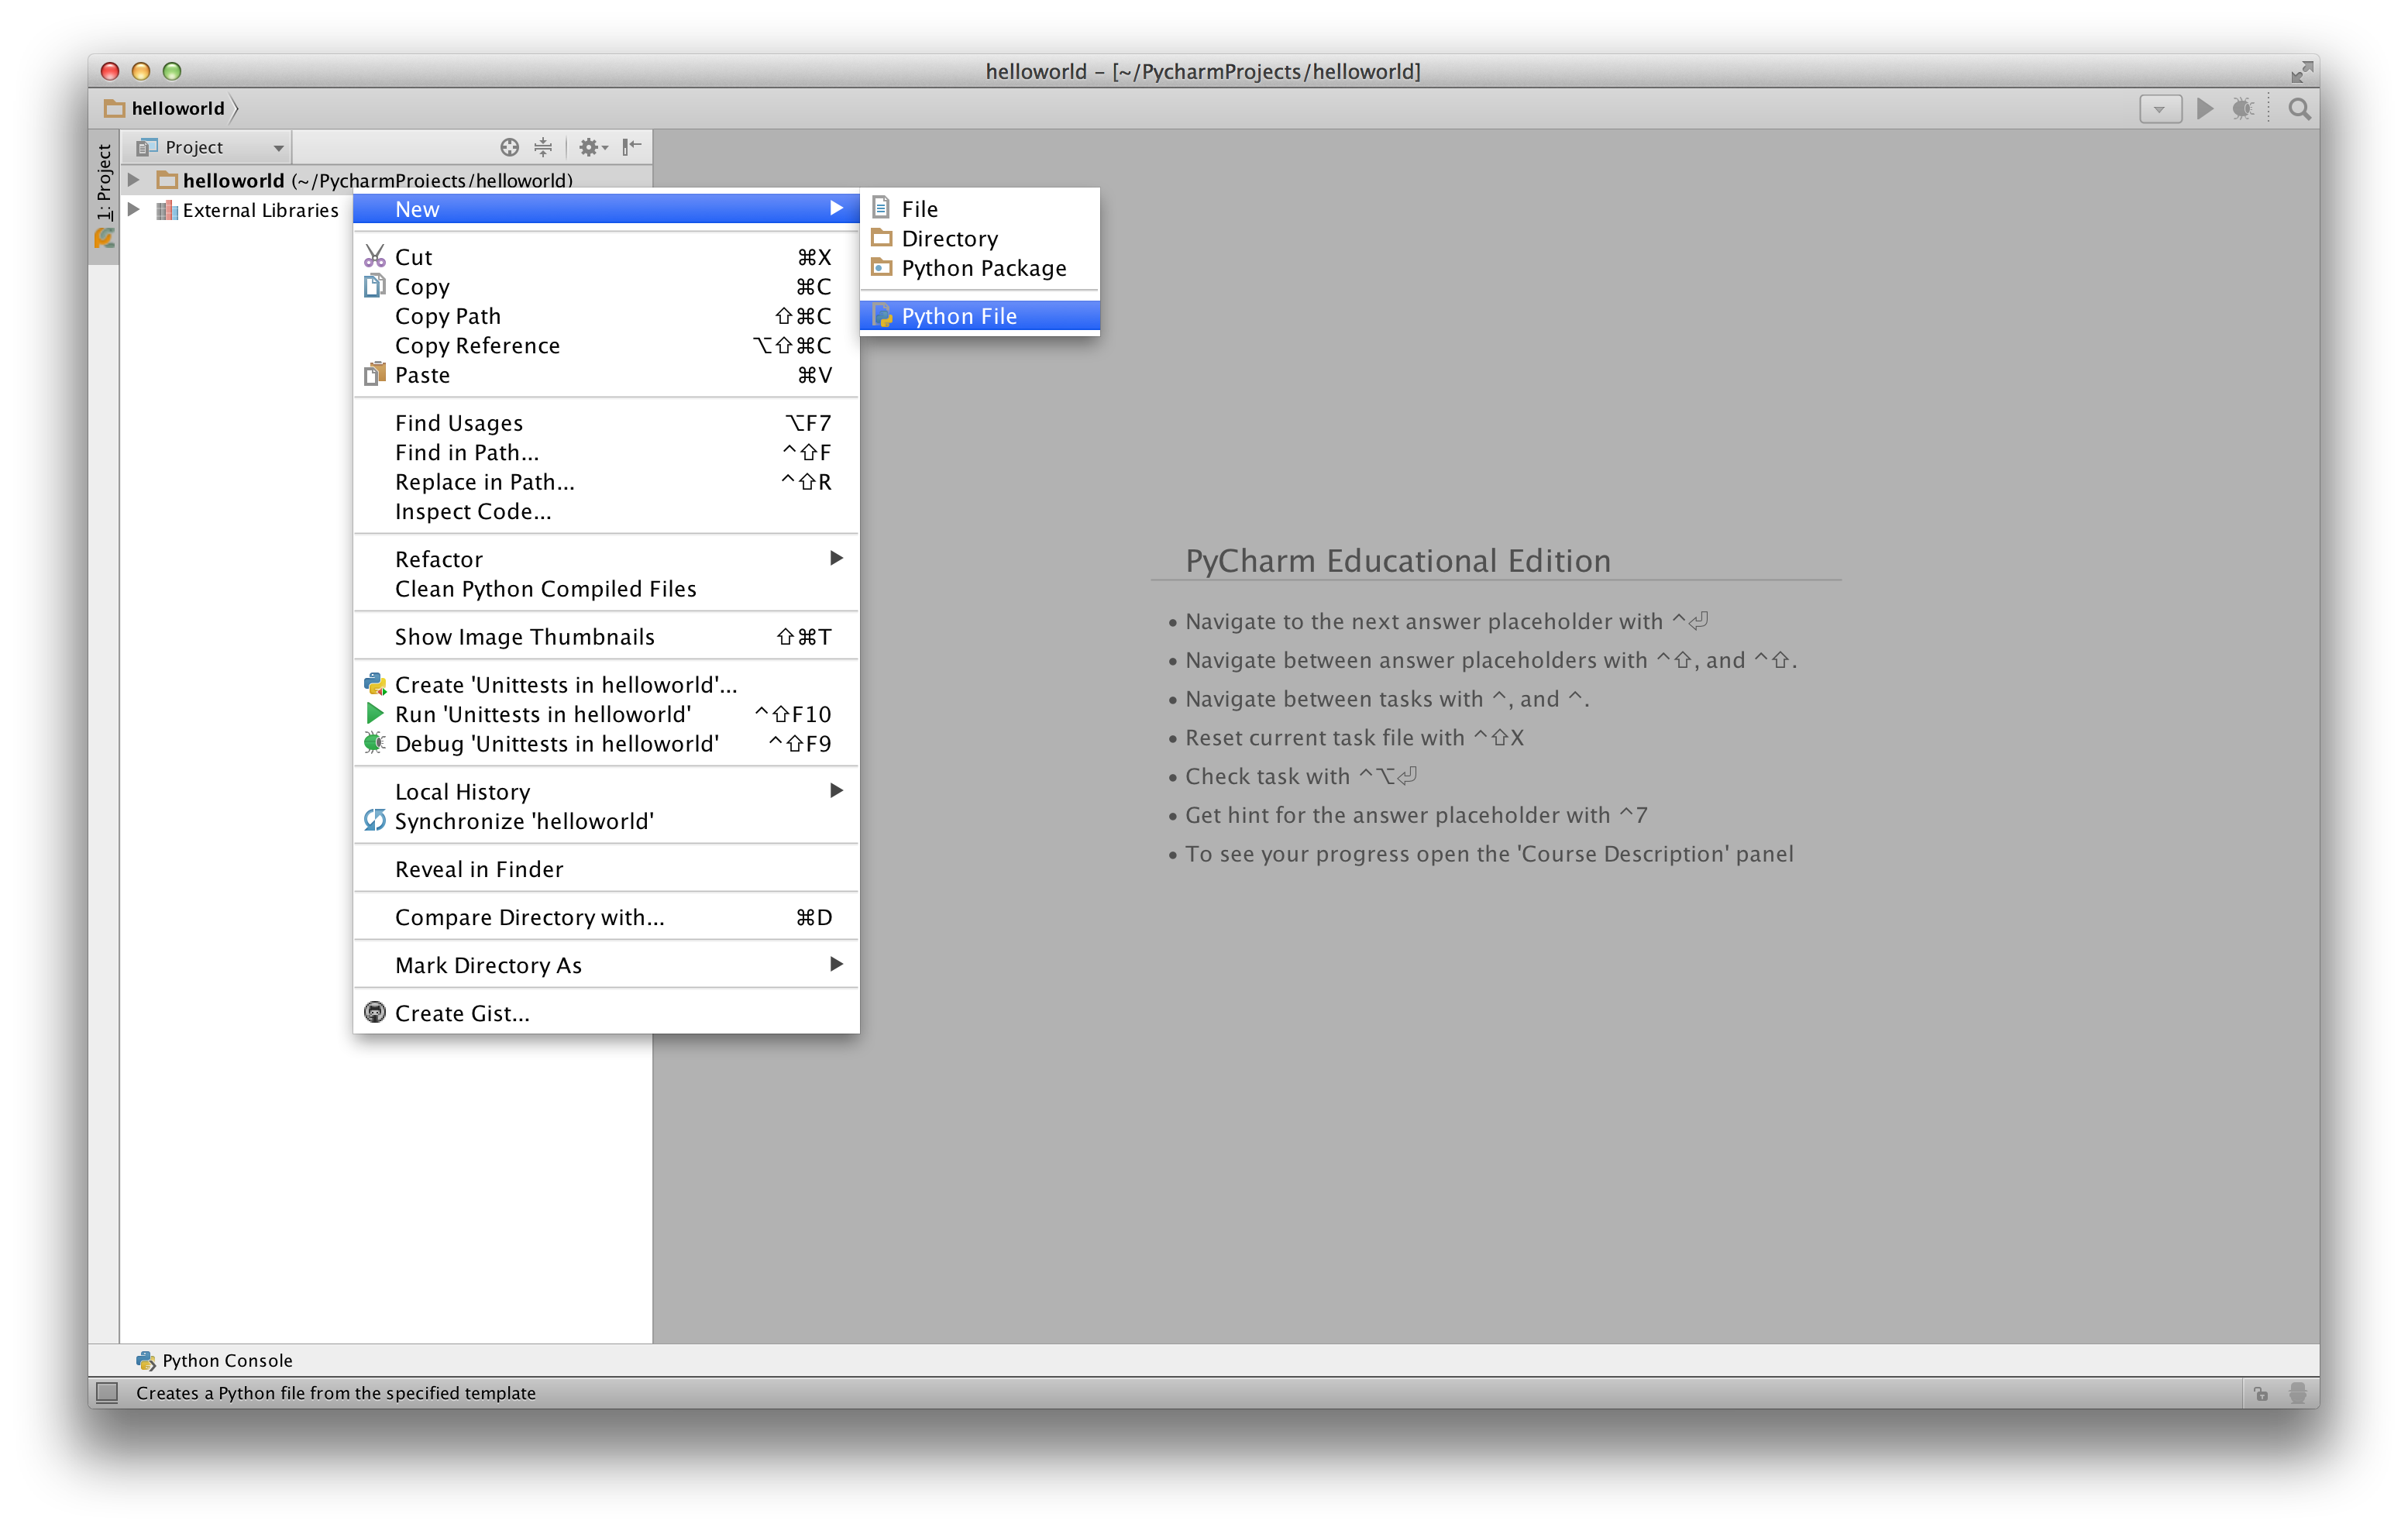
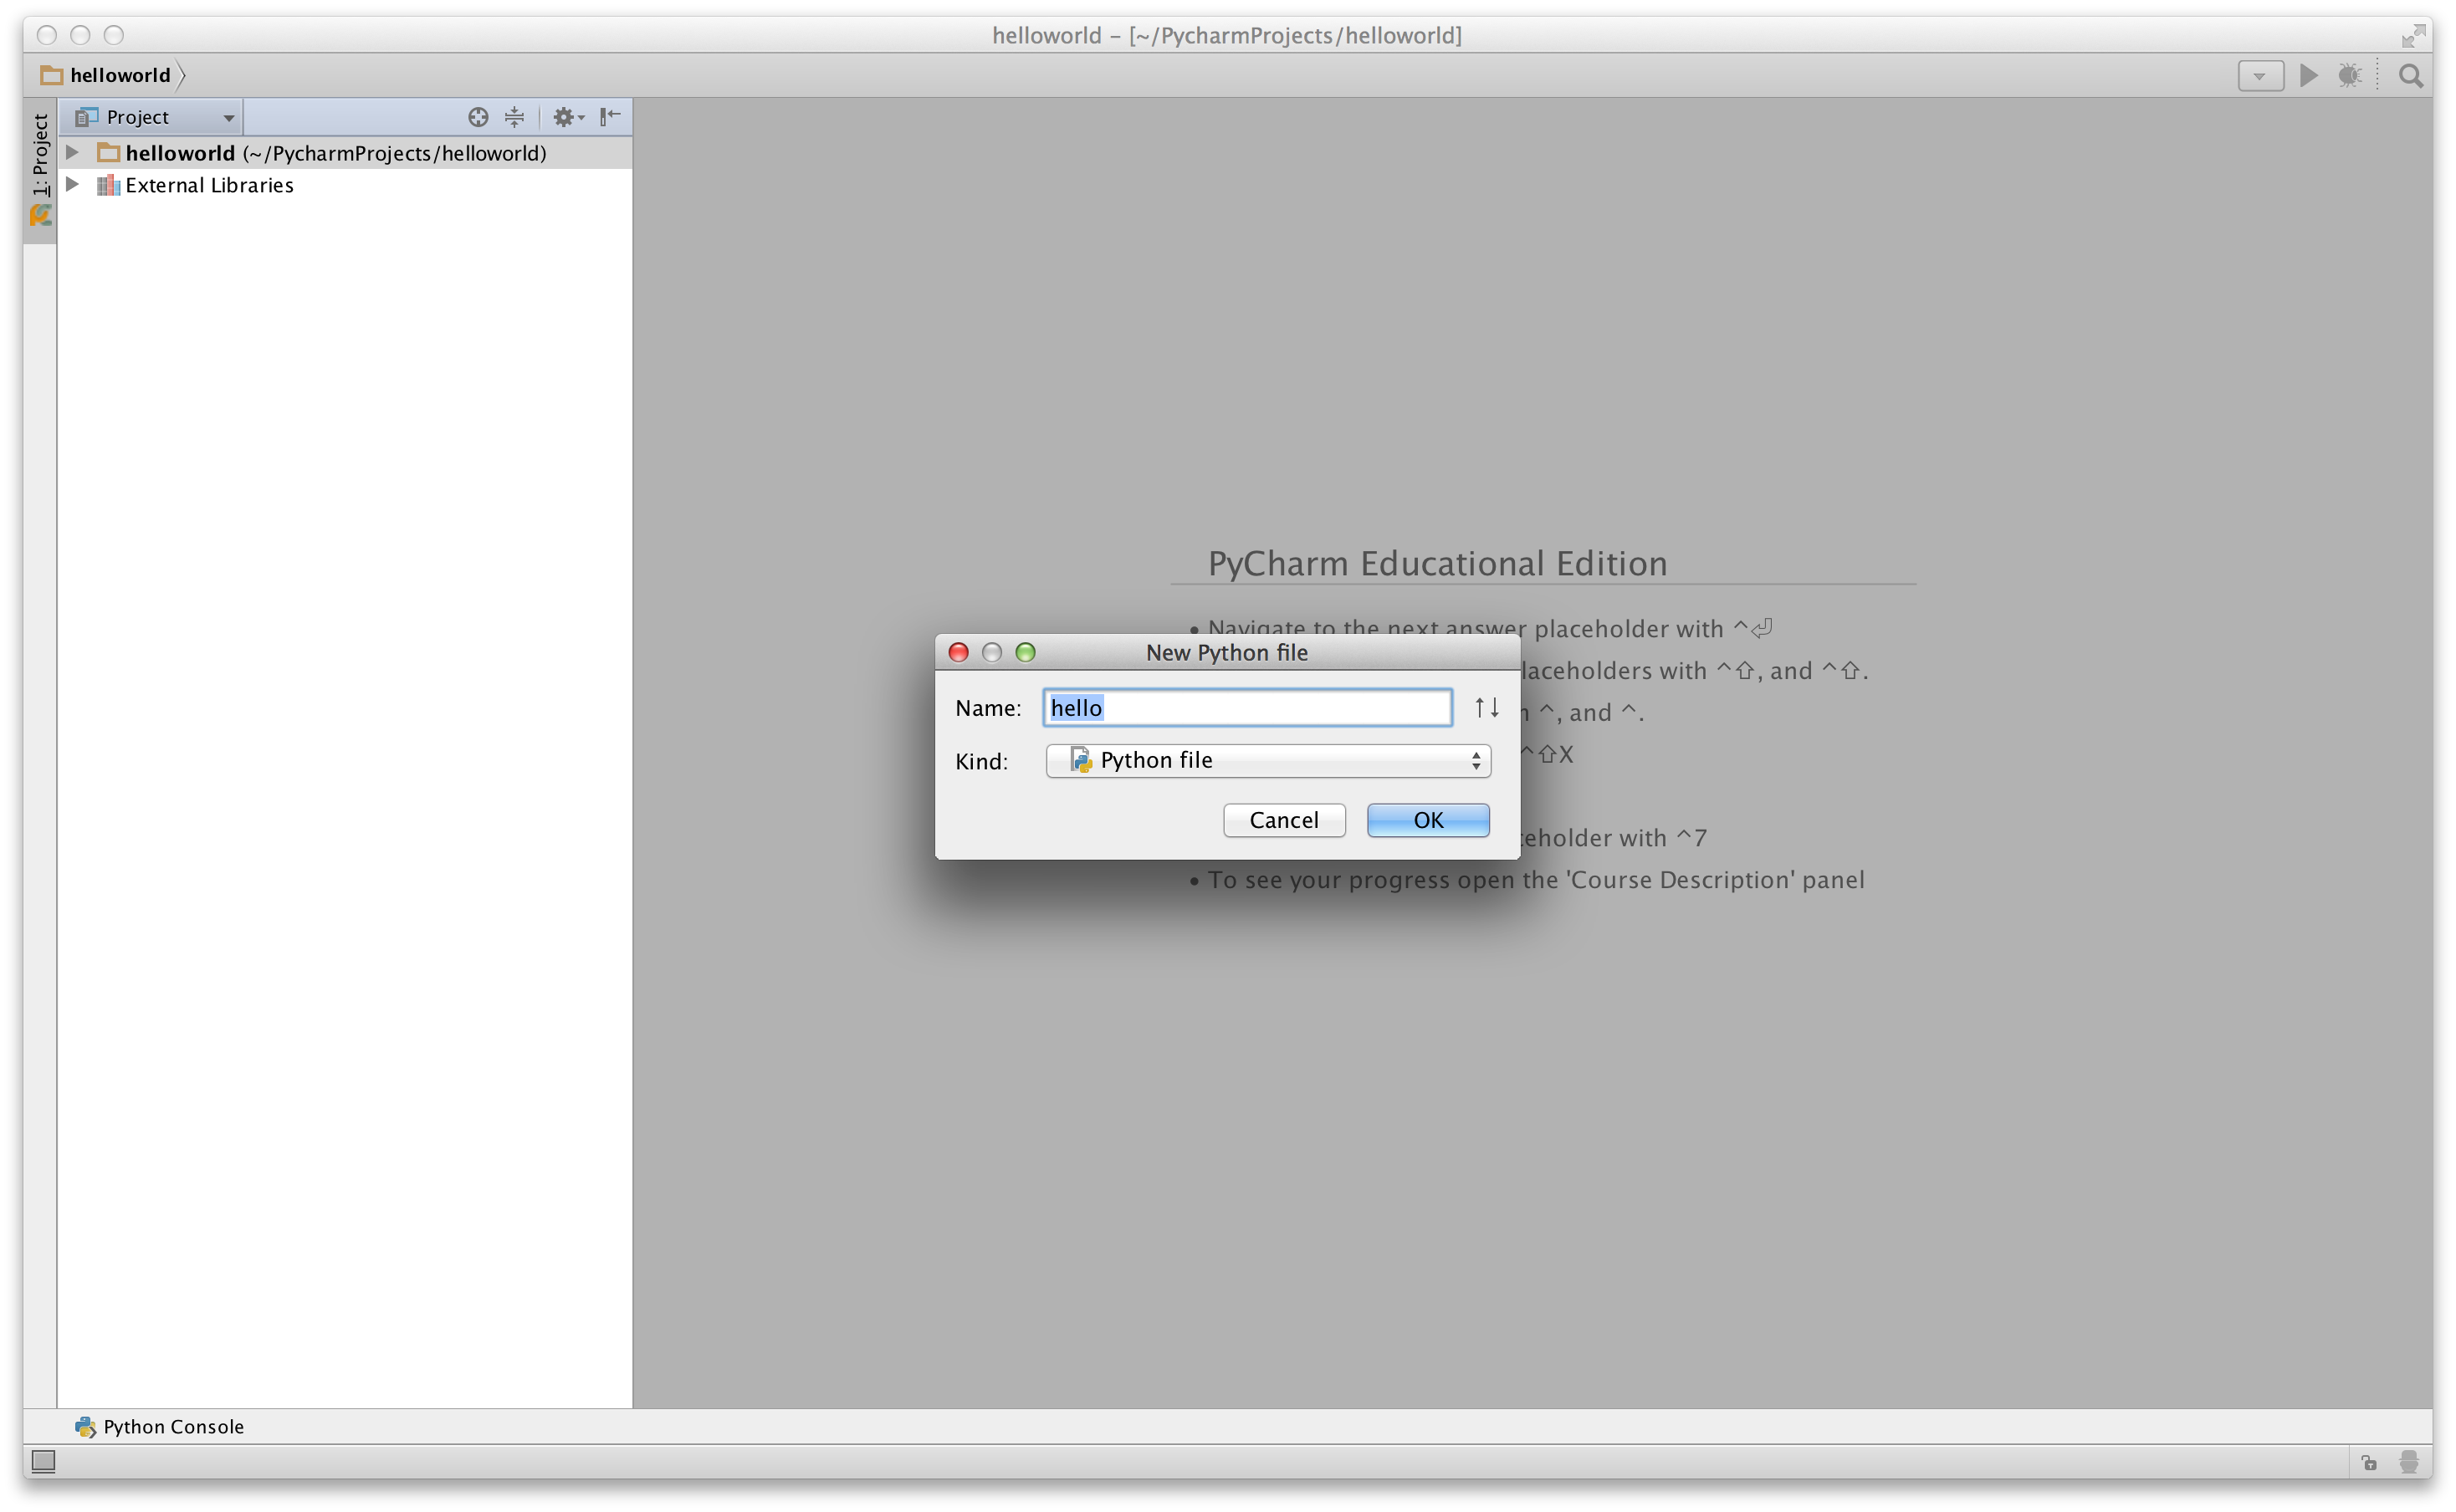
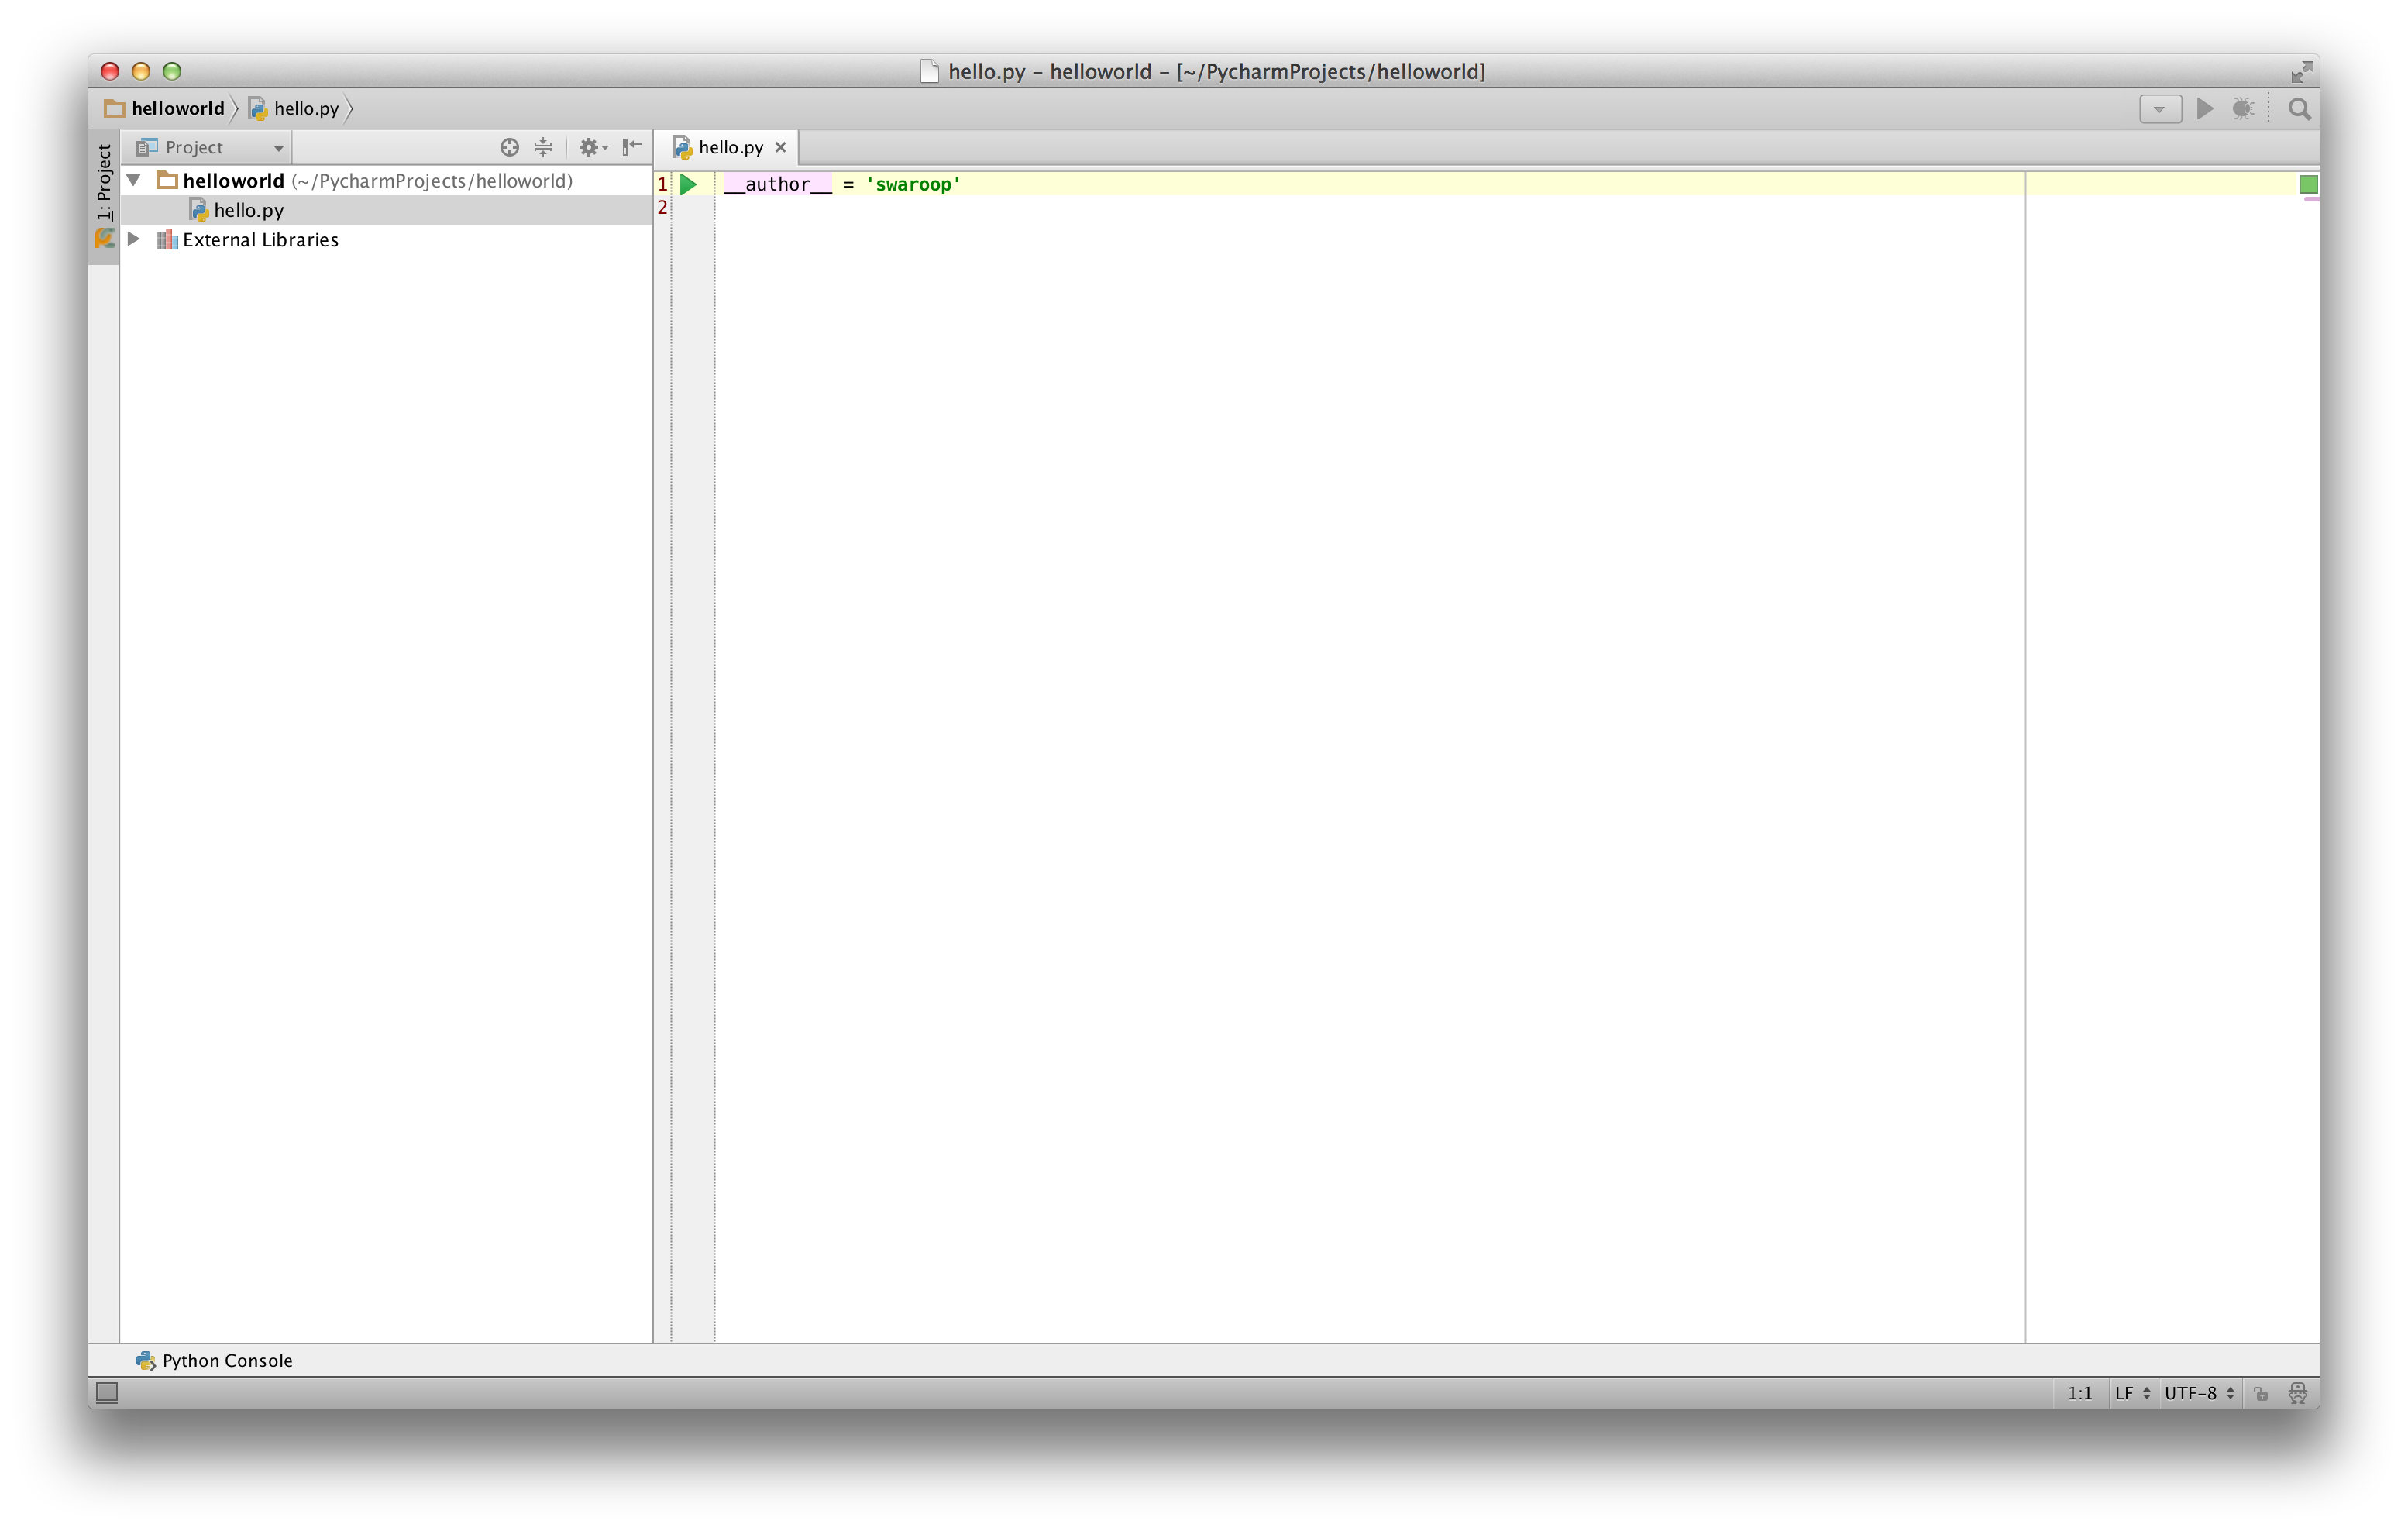
print("howdy world") 

cheongcheokhonganscialtat.blogspot.com
Source: https://salesforce888.wordpress.com/category/python/
0 Response to "Salesforce You Cant Run More Than 500 Reports Synchronously Every 60 Minutes. Try Again Later."
Post a Comment